 Add margin notes to your next book project
With margin notes, you can provide notes for your reader, such as extra context, errata, or pointers to other material.
I use LibreOffice Writer to write my documentation, including client proposals, training materials, and books. Sometimes when I work on a very technical document, I might need to add a margin note to a document, to provide extra context or to make some other note about the text.
LibreOffice Writer doesn't have a "margin note" feature but instead implements margin notes as frames. Here is how I add margin notes as frames in a LibreOffice document.
Make room with wide page margins
If you know you'll need to include margin notes in a document, you'll need a wider margin than the standard 1-inch on the left and right sides of the page. This will accommodate placing the frame completely in the margin, so it becomes a true margin note. In my documents, I don't want the margin to become too wide, so I usually increase the left and right page margins to something like 1.5" when I need to use margin notes.
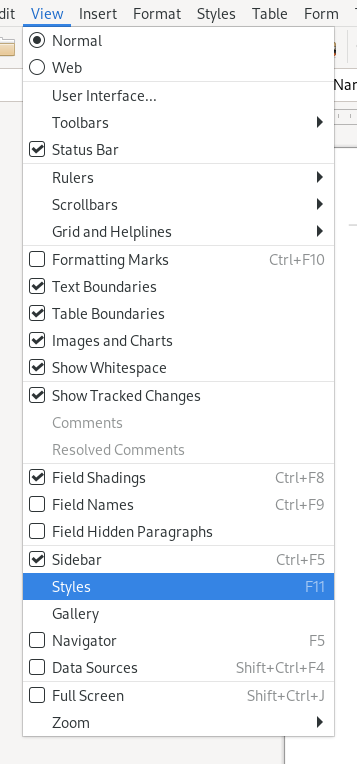
You can set the page margin by using the Styles pop-out selection box. If you don't see the Styles selection box, you can activate it by using View > Style in the menus. The default keyboard shortcut for this is F11.
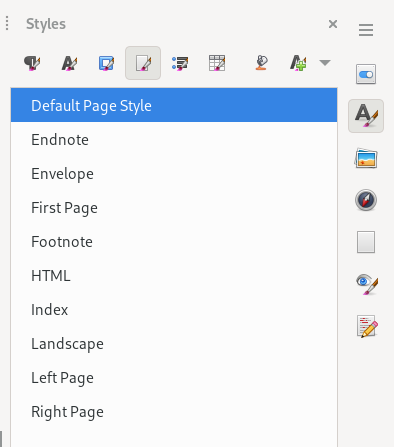
Select the Page style, and right-click on the Default Page Style entry to modify it.
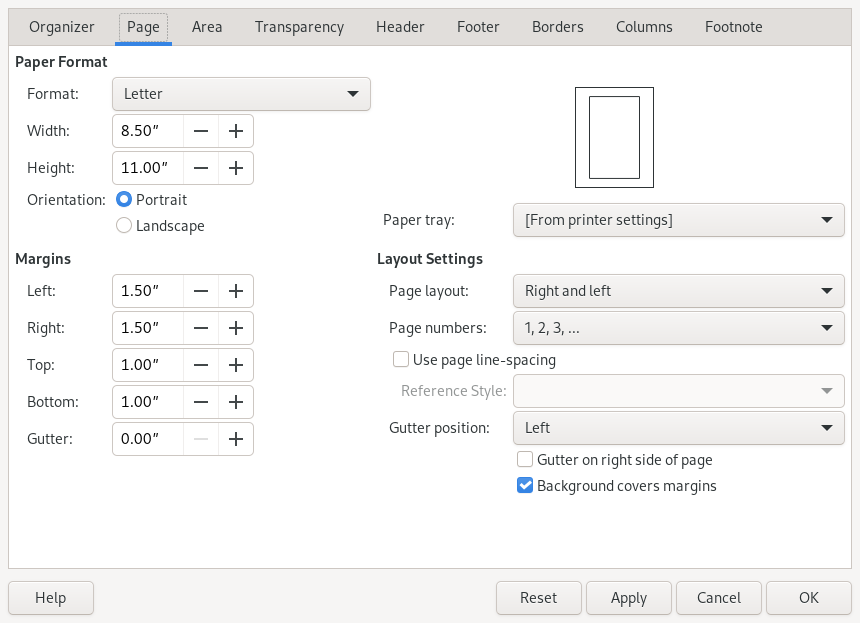
You can use this dialog box to change the page size and the margins. Where you might normally set a 1-inch margin on the left, right, top, and bottom for your documents, instead set the margins to 1.5" on the left and right, and 1-inch on the top and bottom. The extra space on the left and right will provide a little extra room for the page margins without adding too much blank space.
When I'm writing a print edition of a book, I need to prepare the document for double-sided printing, with Left and Right pages. That means my materials need to use the Left Page and Right Page styles for the body pages, and the First Page style for the cover page. So after I modify the document's default page style, I need to do the same for the First Page, Left Page, and Right Page styles. The first time you edit these page styles, they will inherit the page size from the default, so you only need to modify the page margins to your preferred style. For documents with Left and Right pages, you might instead provide the 1.5" margin only on the "outside" margins: the right side for Right pages, and the left side for Left pages.
Add a frame for the note
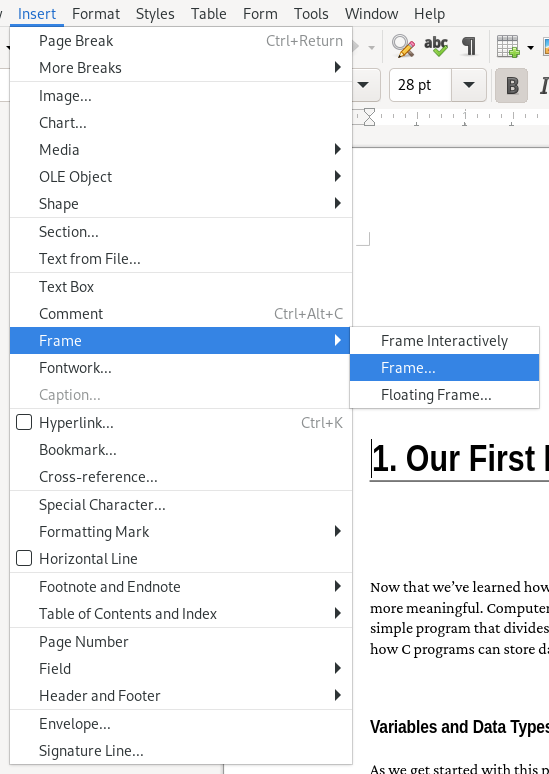
Wherever you need to add a margin note, insert a frame using the Insert > Frame > Frame… menu action. This brings up a dialog box where you can edit the settings of the frame.
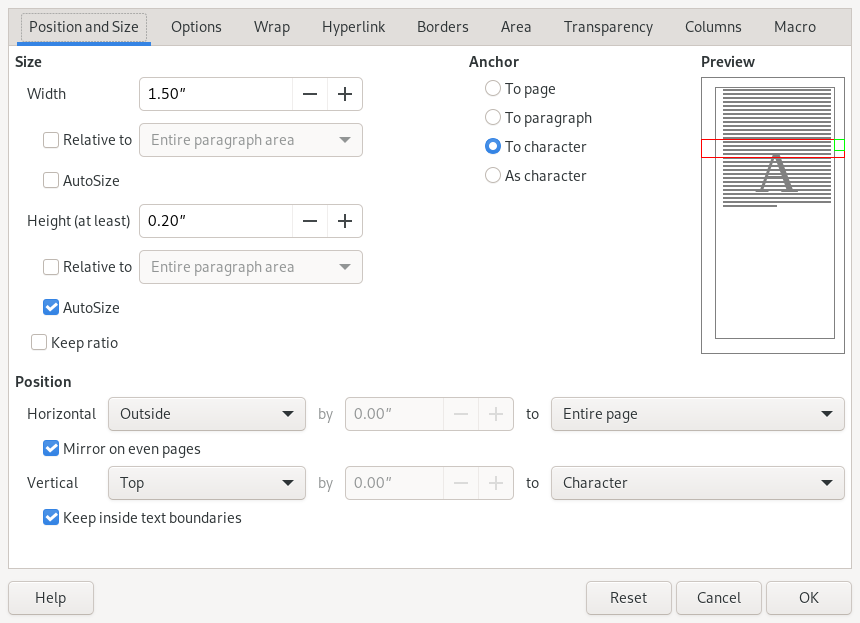
Set the width of the frame to the width of the outside page margin, which you earlier set to 1.5". Click the box for Mirror on even pages then set the horizontal position to Outside for the Entire page. Set the anchor as To character, which will lock the margin note to where it appears in the document, then set the vertical position to Top for the Character, which will start the margin note on the same line as where you insert the frame. I also select Keep inside text boundaries so my frame stays within the printed page.
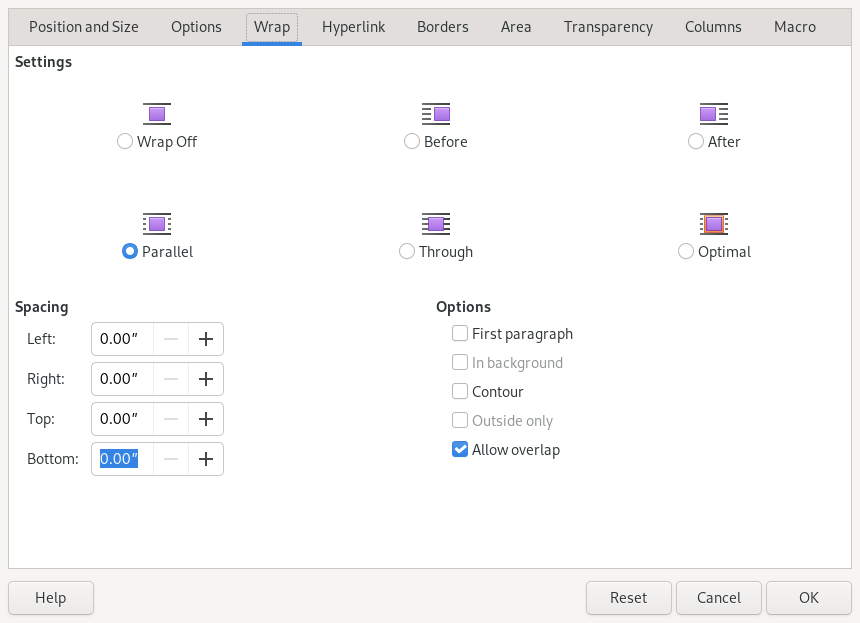
Under the Wrap tab, set the spacing to zero on the left, right, top, and bottom.
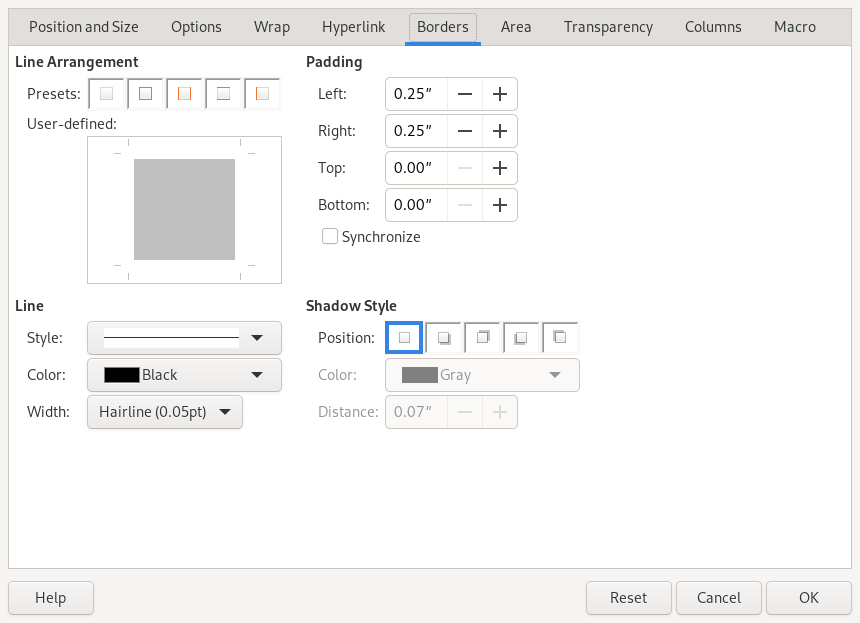
Finally, select the Borders tab and remove the border by clicking the No Borders preset. Unselect the Synchronize check box, and set the left and right padding to .25", and the top and bottom padding to zero. The left and right padding is important. This provides some extra white space around your margin note so it isn't jammed right up against the text body, and it isn't too close to the page edge.
Click Ok to add the empty frame to your document, anchored to the character position where you inserted the frame.

The frame padding changes the effective width of the margin note. In this example, you set the outside page margin and frame width to 1.5" and .25" for left and right padding within the frame. That effectively creates a 1-inch margin note with space on either side. This is usually enough for a brief note. If you need more room for your margin notes, set the outside page margins accordingly to leave room for a wider note in a frame.
Once you've added the frame, you can click inside the frame to type your margin note.

Set the look with styles
When you use frames to add margin notes, LibreOffice uses the Frame Contents paragraph style for your text. You can modify this style to change how margin notes are displayed.
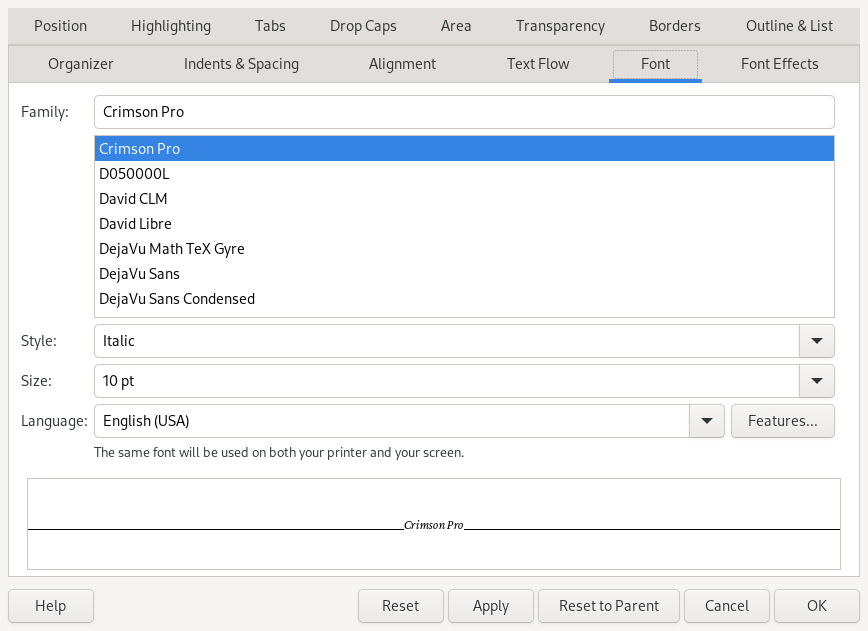
By default, the Frame Contents style uses the same font, font style, and font size as the Default Paragraph Style. To change just the characteristics of the margin note, right-click on the Frame Contents style in the Style Selection selection box, and click Modify. This brings up a new dialog box where you can change the style of the margin notes.
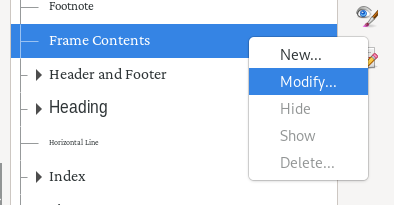
In my printed documents, I use Crimson Pro at 12-point size as my default paragraph font. For my margin notes, I prefer to reduce the font size to 10-point and change the style to italics. This makes the margin note stand apart from the rest of the text, yet remains easy to read in print.

Copy and paste to make new notes
Inserting a frame as a margin note involves several steps, and it can be a pain to repeat each of them whenever I need to create a new margin note. I save a few steps by copying an existing margin note frame, and pasting it into my document at a new position. Updating the margin note requires selecting the text within the frame and typing a new note.
Because you set up the margin note to appear on the outside of the page area, the copied and pasted margin note will correctly appear in the left margin on Left pages, and in the right margin on Right pages.
Adding margin notes in a document is easy with LibreOffice. With margin notes, you can provide notes for your reader, such as extra context, errata, or pointers to other material. Used sparingly, margin notes can be a welcome addition to your documents.
