 Managing Menus in Drupal 10
Discover the basics of menu management and some contributed Drupal 10 modules for menus.
Well-built navigation is essential for the user experience and the overall success of a website. Simple, logical, and descriptive menus significantly increase content discovery, boost conversion rates, and benefit SEO.
The Drupal web content management system offers easy and intuitive ways to create and manage menus. For the most part, this article will be useful regardless of the Drupal version. However, menu management is more seamless in Drupal 10 which features a modern, accessible, and user-friendly Claro admin theme, and we have picked some interesting extra modules that are already compatible with Drupal 10.
A Drupal website's admin page for menus
All the website's menus are listed on the Structure > Menus page of the Drupal admin dashboard. The existing menus can be edited there, and new menus can be created.

Drupal offers some menus out of the box that you can see on the Structure > Menus page:
- Main navigation. This is the top-level menu of the website that visitors see in a prominent place.
- Footer. This one's meant for important pages in the website's footer.
- Administration. This menu has links to administrative tasks like "Structure" and "Configuration."
- Tools. This menu has links to tasks that website users can perform, such as "Add content.
- User account menu. It has links for the user account, including "My account" and "Log out."
Managing the key details of a menu
Each menu on the list has an "Operations" dropdown next to it. By clicking "Edit," you'll be redirected to the menu page enabling you to change the menu's title and administrative summary.

Next, the menu editing page lists all the menu links. You can check or uncheck the "Enabled" checkbox next to a specific menu link to display or hide it or delete it entirely by clicking "Delete" on the "Operations" dropdown.
You can change the order or the hierarchy levels of the links in two alternative ways:
1. By drag-and-dropping the links, both horizontally and vertically. All the menu links are displayed as a hierarchy, where the indent shows depth. In our example, the "Our Services" page is the parent to the "Business Strategy," "Financial Advisory," and "Process Optimization" pages.
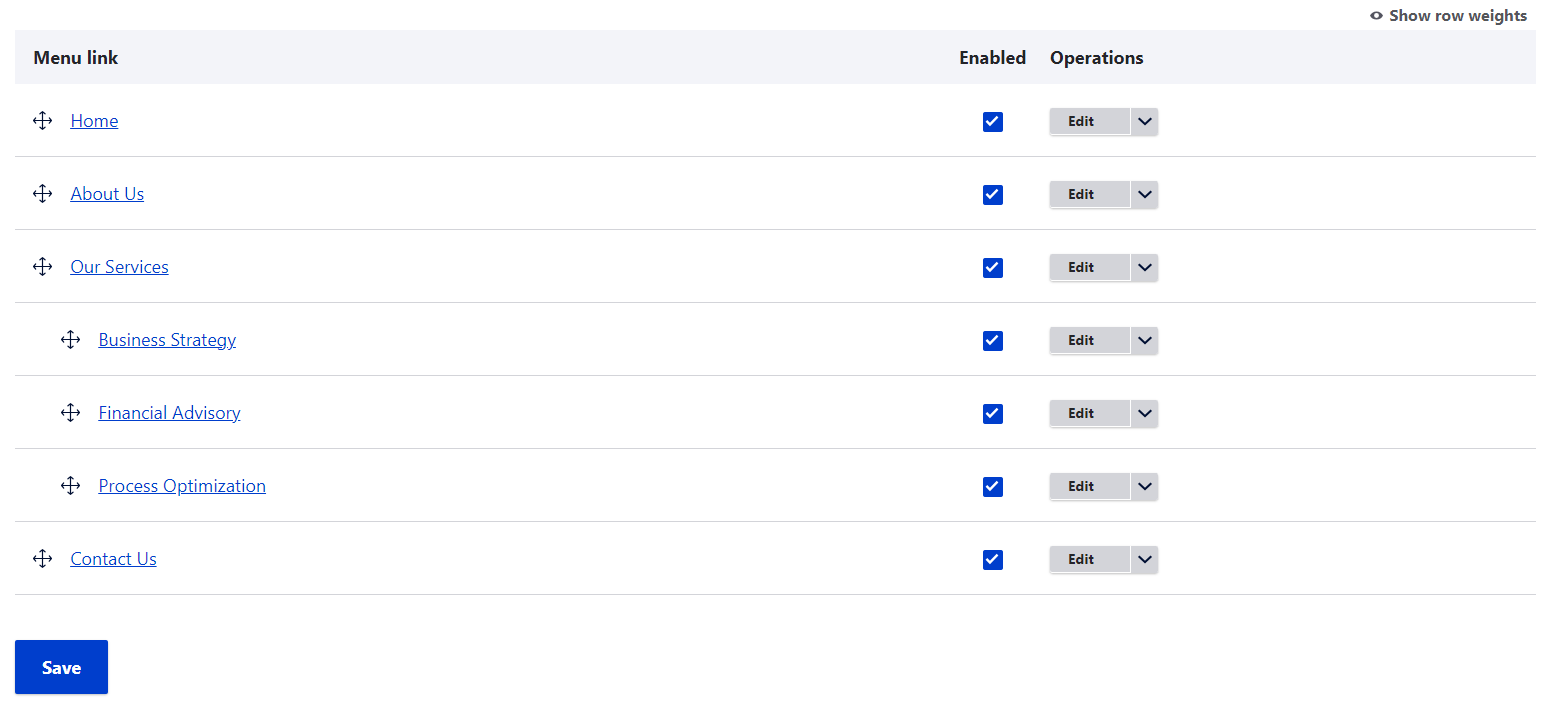
2. Instead of drag-and-dropping, you can click the "Show row weights" link at the top and change the link weight. When there are several links on the same level, their order depends on the weight - the lower the weight, the higher the link is displayed.

When you're done, click "Save" at the bottom of the page.
Adding a new link or editing an existing link
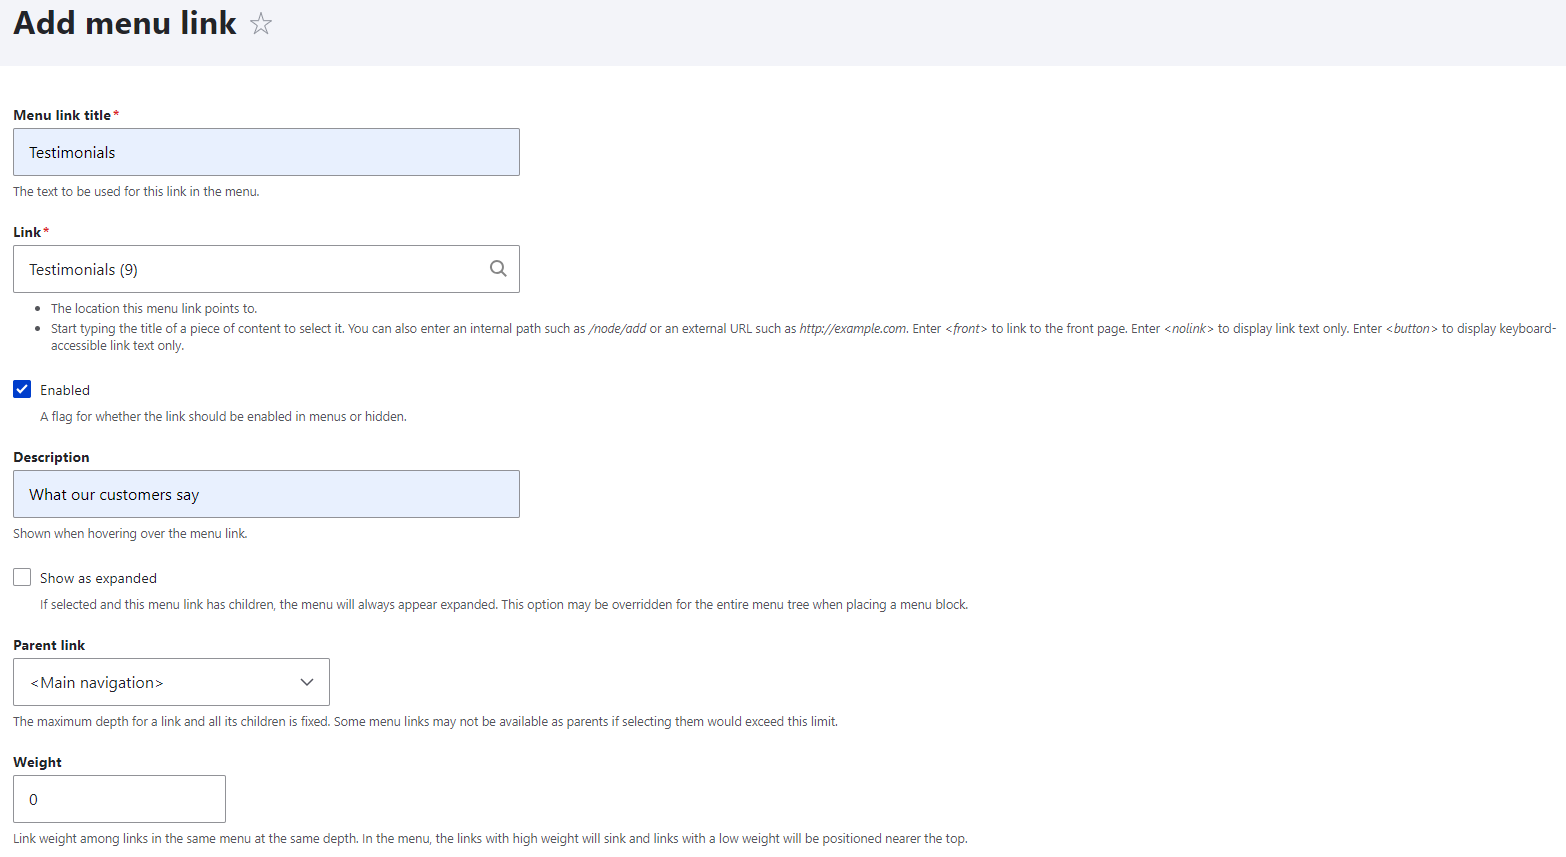
You can add a new link by clicking the "Add link" button in a specific menu's editing form or the "Add link" option in the dropdown next to a specific menu on the list of menus. Do these steps on the link-adding page to insert the new link:
- Give your link a title (such as "Testimonials")
- Specify where it needs to lead - start typing the name of the content piece or use an internal or external URL path
- If you need to disable this menu link, uncheck the "Enabled" checkbox
- Provide a description that will be displayed whenever the link is hovered over
- Check the "Show as expanded" checkbox if you want the child items of this link (if there are any in the future) to always appear expanded
- Specify the parent link (for example, our "Testimonials" page will be a child page for the "Main Navigation" menu)
- Specify the weight that will decide which link will be displayed higher among several links of the same depth
- Click "Save"
If you need to edit an existing link, click "Edit" right next to it and a form with similar fields will open to you.
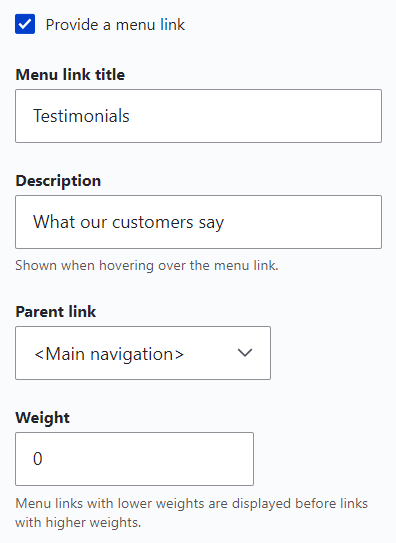
Alternatively, you can use the content editing form to add a specific content node to a menu (or change the menu it should belong to). When checked, the "Provide a menu link" checkbox in the "Menu settings" in the right part of the content editing form expands the link options. You need to add the link description and specify the parent link. There also are the link weight field, and the "Enabled" and "Show as expanded" checkboxes. Click "Save" once you've filled out the details.
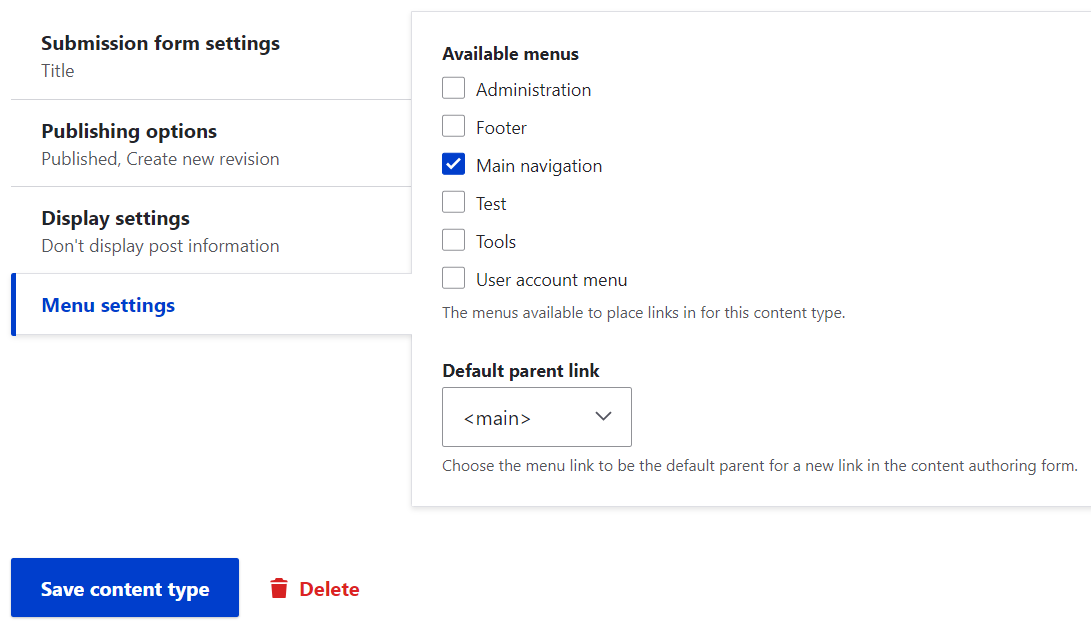
The menu settings only appear in the content editing form if the available menus are enabled for this content type. You can do it by going to Structure > Content types, clicking "Edit" for the specific content type, finding the Menu settings, and making sure the checkboxes for the specific menus are checked. Click "Save content type."
Once you've added a new link, make sure it is displayed in the right order by visiting your menu page and reordering the links if needed.
Creating a new menu
Click "Add menu" on the Structure > Menus page, provide its title and administrative summary, then start adding links by clicking the "Add link" button as described above. As usual, save the result.
Each menu has a corresponding block in Drupal. This enables you to place a newly created menu anywhere on your website or change the position of an existing menu via the Structure > Block layout page or the Layout Builder in Drupal 10.
For example, to add a menu via the Structure > Block layout page, select your website's theme region where you want to put the menu (such as Header) and click "Place block" next to it.
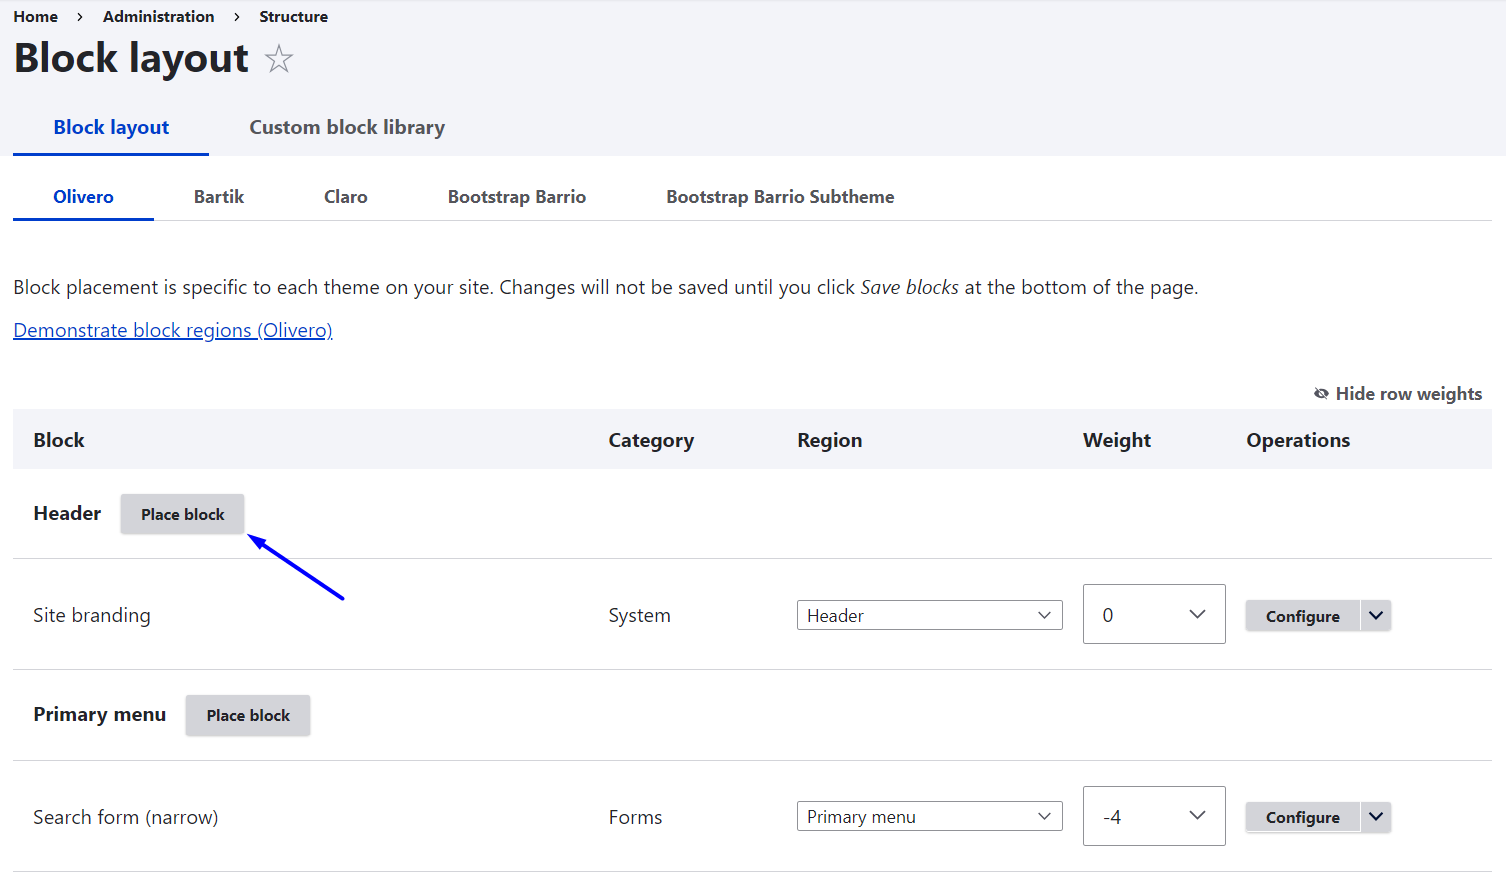
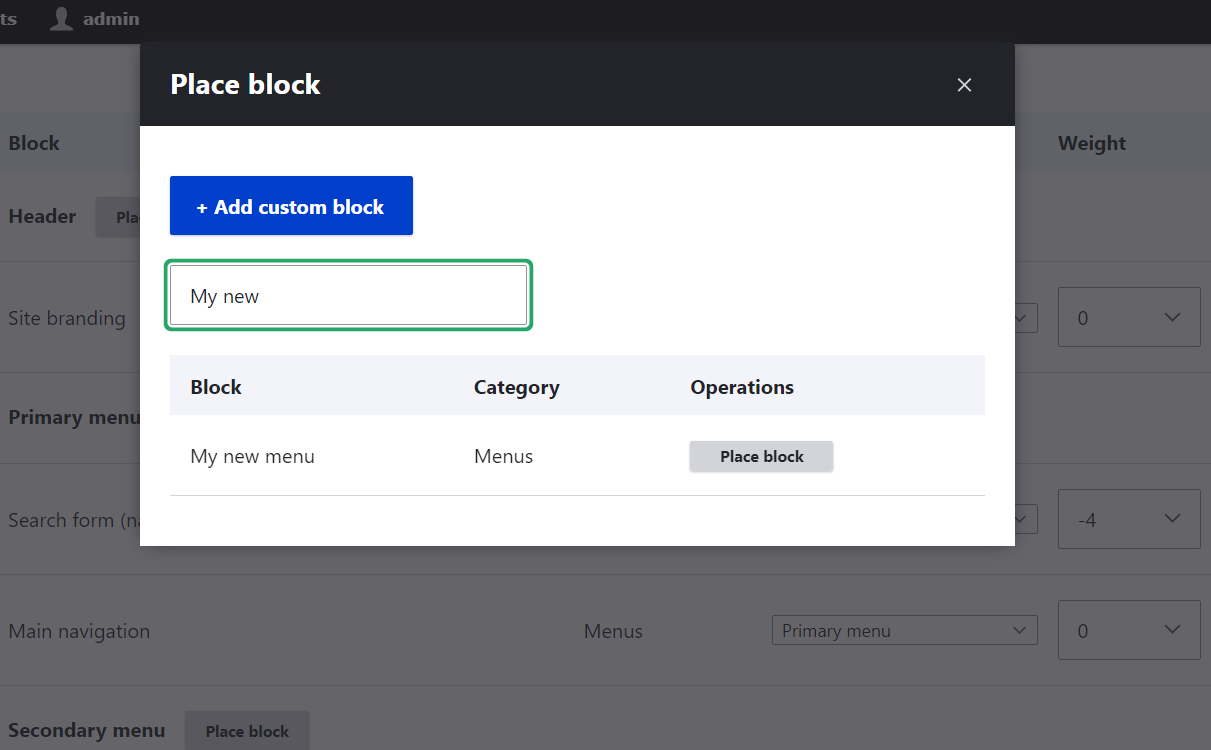
You'll see a list of blocks where you'll need to find your menu and click "Place block" to add it.
The next step will lead you to the menu configuration page where you can optionally configure on which pages to show this menu and other details. Finally, click "Save block" and then "Save blocks" at the bottom of the Block layout page.
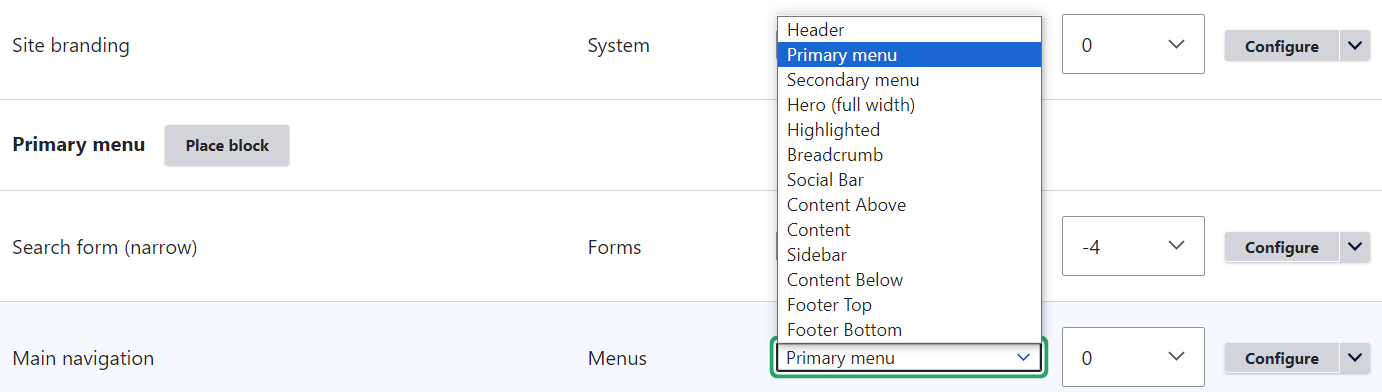
To change the position of a menu block that's already been put in the Block layout, just select another region in the dropdown next to it and then save the result:
Try menus in Drupal 10
Drupal has lots of extensible features for menus that make creating websites a snap. For more great compatible menu modules for Drupal 10, try these options:
Superfish - for creating multi-level drop-down menus
TB Mega Menu - for building dropdown menus with multimedia and animation effects
Simple Menu Icons - for adding icon images to the menu links
Font Awesome Menu Icons - for using Font Awesome icons in the menus
Menu Item Extras - for adding images or other additional elements to menus
Menu Item Role Access - for restricting access to specific menu items
Taxonomy Menu UI - for having menu settings on the taxonomy page
Menu Position - for putting certain types of content in a specific position
Easy Breadcrumb - for putting the current page into the breadcrumb menu

Nadiia Nykolaichuk, also known as Nadine, is a technical copywriter at ImageX. She started her journey with Drupal in 2015, and as she was taking her first steps in Drupal copywriting, she fell in love with the main "hero" of her own articles and strives to inspire readers to love Drupal too!