 Configuring roles and permissions in Drupal
Take a tour of configuring user roles and permissions in Drupal both with the core options and with the help of some useful contributed modules.
Drupal has a robust system of roles and permissions enabling you to specify at a granular level what users can do on your website—from editing content to administering Drupal updates. Giving sufficient but not excessive permissions to the right users is vital for enhancing your Drupal website’s security.
Let’s tour configuring roles and permissions using the Drupal administration UI, both with the Drupal core options and with some useful contributed modules.
An overview of Drupal roles and permissions
Roles help you categorize your website’s users based on their responsibilities, which is achieved by granting the respective sets of permissions to each role. The next step is to assign roles to specific users.
Examples of custom roles are Moderator, Premium Member, Subscriber, Analytics Viewer, Event Manager, and so on, depending on the website’s needs. You can create an unlimited number of roles. However, the out-of-the-box Drupal roles are enough for many websites.
Drupal has four built-in roles with a set of pre-configured permissions:
- Administrator. The primary administrator account is created with the new Drupal installation. An administrator has all possible permissions by default, so the person with this role can do anything up to erasing the entire website by deleting critical files and database entries. For special security, give it a unique username and a hard-to-guess password based on the best practices of creating strong passwords in Drupal. Never give the administrator credentials to the entire team—let everyone have a set of limited permissions. It’s also better to create a role for regular administrative work instead of using the super administrator account, or even disable the latter entirely.
- Authenticated user. All logged-in Drupal users are assigned the “Authenticated user” and a numeric ID of 2, 3, and so on. Whatever permissions you give to this role will be automatically assigned to all other roles except “Anonymous user.” For example, “Editor” will be able to do anything that “Authenticated user” can.
- Anonymous user. Every user not logged in is assigned this role, as well as a numeric ID of 0. They have the fewest permissions. For example, it’s recommended to forbid them to publish comments to protect your Drupal website from spambots.
- Content editor. You will only find this role in the Standard installation profile for 9.3 websites or newer. The permissions for it are centered around content creation. For example, content editors can create content, edit, and delete their own content but not just any content.
Managing roles and permissions in Drupal
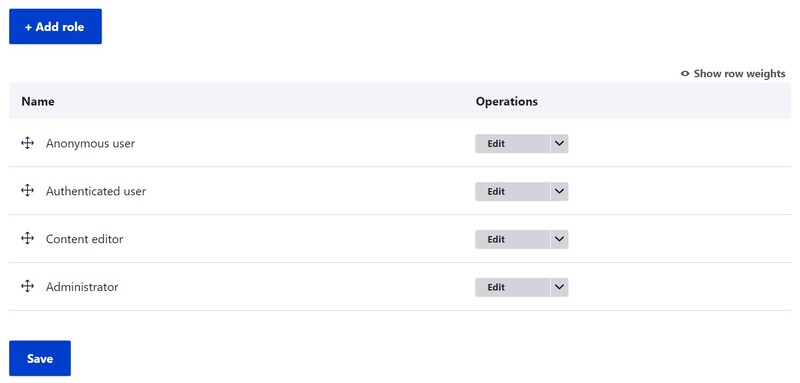
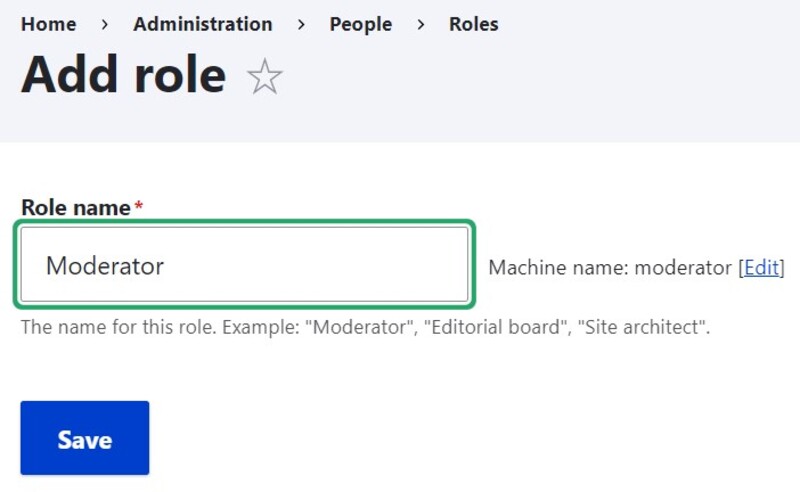
You can view the existing roles on the People > Roles page. By clicking “Edit permissions,” you open the permissions page for a certain role. By clicking “Add role,” you can create a new role, give it a name, and click “Save.”
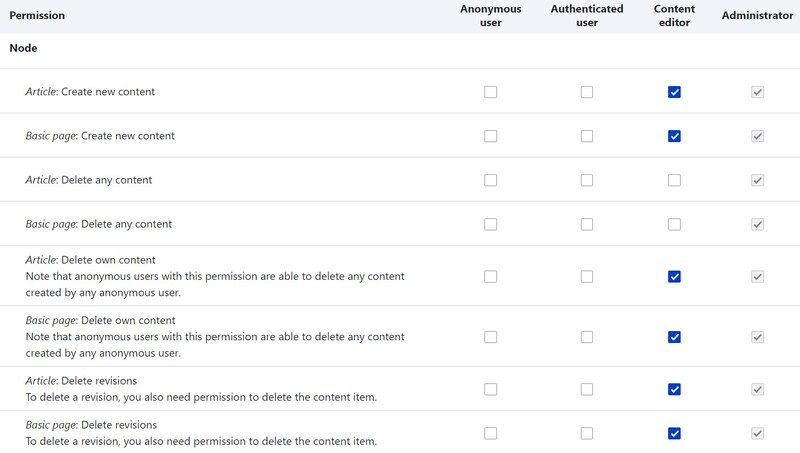
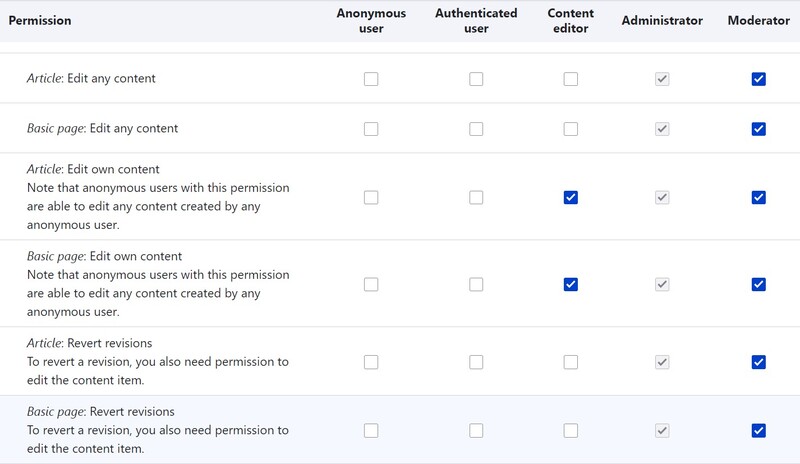
You’ll also need to create the permissions for the newly created role. You can find the permissions for a specific role by clicking “Manage permissions” next to this role on the list. Alternatively, go directly to the People > Permissions page where they are listed for all roles so it’s easy to compare them.
Assigning and unassigning permissions is a matter of ticking the respective checkboxes and then clicking “Save permissions” at the bottom of the page.
The permissions are grouped based on the module that is responsible for them—for example, the Taxonomy module deals with creating, editing, and deleting terms, administering vocabularies, etc. Contributed modules often add their own permissions, which happens automatically, and it’s a good idea to double-check if they meet your website’s needs.
Useful contributed modules for roles and permissions
Here are some examples of interesting contributed modules, and what you can do with their help to provide even more role and permission granularity:
- Visit the website as any user for testing purposes, including the test of the assigned permissions (Masquerade)
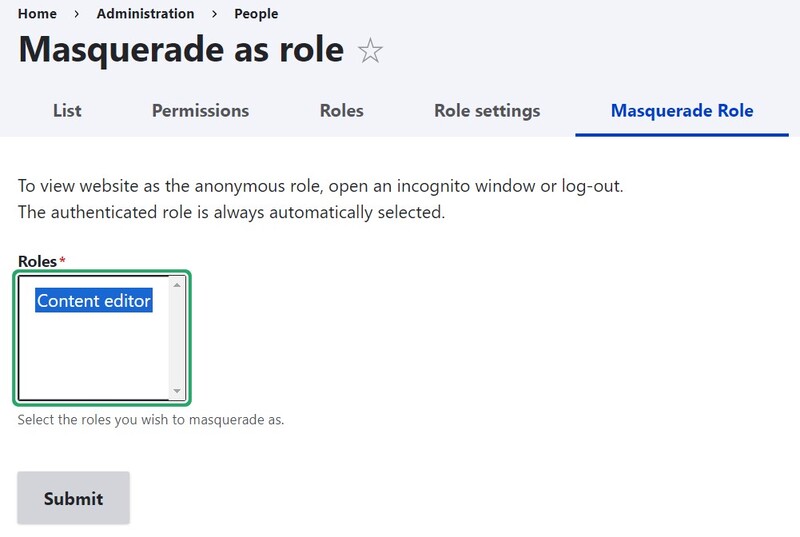
- Surf the website as a certain role—a lighter version of Masquerade (Masquerade Role)
- Allow users to manage specific menus instead of giving them site-wide menu management permissions (Menu Admin per Menu)
- Give users permission to create a new menu, as well as view, edit, and delete specific menus (Simple Menu Permissions)
- Control access to specific menu items based on user roles (Menu Item Role Access)
- Create granular permissions for specific fields within the Authoring information and Publishing options of a node form (Override Node Options)
- Set expiry dates for roles, which is especially useful for subscription content (Role Expire).

Nadiia Nykolaichuk, also known as Nadine, is a technical copywriter at ImageX. She started her journey with Drupal in 2015, and as she was taking her first steps in Drupal copywriting, she fell in love with the main "hero" of her own articles and strives to inspire readers to love Drupal too!