 A great device for technical writing
Start here to set up a great system for technical writing, using Linux and open source software.
For a technical writer like me, the keyboard is a portal to a world of code and circuitry. Every article I publish, and every line of documentation I craft is a bridge between complex tech and the minds eager to understand it. But the tools that shape those words matter; for me, that means embracing the freedom and flexibility of open source.
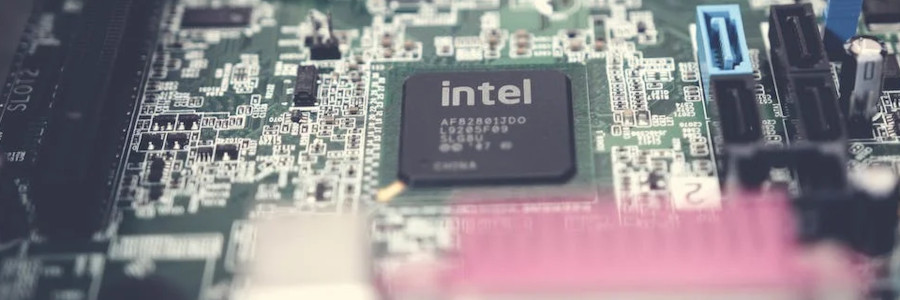
Enter my trusty Intel NUC, a compact cube that pulsates with the spirit of Linux. Gone are the days of bulky desktops; this pint-sized wonder packs a punch under the hood, with an 11th Generation Intel Core i7 with 64 gigabytes of RAM running Linux Mint 21.2, a distribution known for its user-friendliness and stability. It's the perfect canvas for my open-source software playground, a platform where I can code, compile, and weave words into the tapestry of tech knowledge.
This isn't just about personal preference. Open-source software and Linux are more than just tools; they're the beating heart of my mission. By choosing them, I embrace transparency, collaboration, and community—values that resonate deeply with the very essence of technical writing.
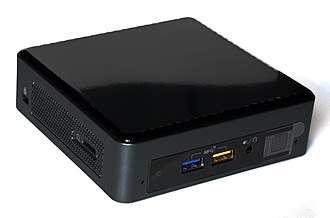
Building your own barebones computer from scratch gives you the freedom to equip the vehicle for your technical writing in the manner you want rather than accepting defaults offered by off the shelf units that you could purchase at a retail outlet.
A lot of research for a little PC
Embarking on the journey of constructing your own computer brings forth a distinct feeling of liberation. Instead of accepting predetermined choices from a computer manufacturer, you have the privilege of handpicking each component that constitutes your system. Engaging in a do-it-yourself PC project not only entails an element of risk and adventure but also lends a greater sense of accomplishment compared to a mere purchase.
To ensure the compatibility and viability of my selected NUC and its associated components, I diligently conducted research. As part of this process, I made the decision to switch from Pop!_OS 22.04 to Linux Mint 21.2, which also draws from the Ubuntu 22.04 base. Throughout my journey, I have relied on Cronopete as my chosen backup solution. Anticipating a smooth installation of Mint, I'm confident that I can seamlessly restore my files, reassuring me of the feasibility of my chosen path.
Assembling the NUC
When the package came in the mail, I was eager to assemble my new computer. I took the NUC out of its box and looked at the directions.The NUC has four screws in the base which I loosened until I could easily remove the bottom plate. Once the case was opened it was easy to see where the RAM chips belonged. I gingerly removed them from their packaging and one by one inserted them into their places.
Installing the SSD drive was a bit more difficult. I had to remove a tiny mounting screw before inserting the NVMe drive. Having a good screwdriver with a magnetic tip is an excellent aid when securing the NVME drive in place.
It was finally time to see the fruits of my labor. I connected the NUC to a monitor with an HDMI cable, attached the keyboard and mouse to the USB ports, and turned on the device. As the directions instructed, I pressed the F10 key at startup to enter the BIOS and selected the USB drive on which I had previously installed Linux Mint 21.2.
Booting Linux on a NUC
After connecting the NUC to my Logitech wireless keyboard and mouse and a Sceptre 27 inch monitor I was ready to begin the install. My first boot was unsuccessful, so I disabled the "Secure boot" option and on the second boot, Linux Mint came up! A quick check revealed that the wireless was fine, and the keyboard and mouse were both working. The installation took only about 10 minutes. I added my favorite applications, including the Chrome browser, and began to have some fun.
The Intel NUC is certified on a number of Linux distributions, including Ubuntu, OpenSuse, and Clear Linux.
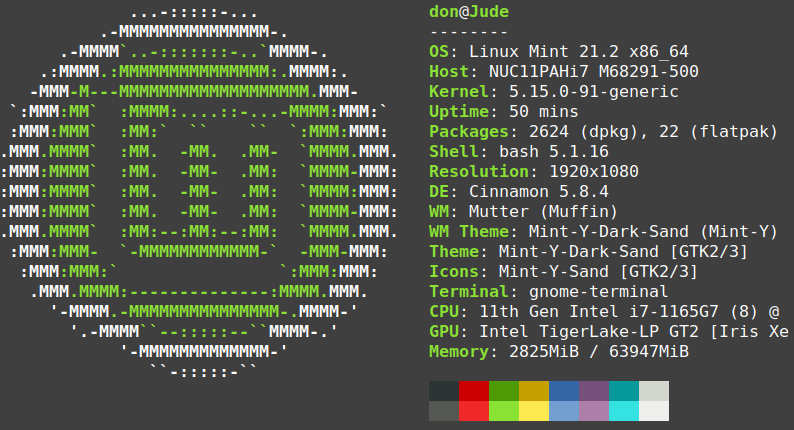
Once the operating system and updates were installed boot time was much quicker than the NUC 10 which I replaced a year ago. I used 'Neofetch' for a quick overview of the system.
Give it a try
I use my system primarily for writing, coding, video conferencing, virtualizing other operating systems, and reading. If you are thinking of building your own compact Linux system, the Intel NUC is an excellent option.
