 How to change fonts in ‘groff’
You don’t have to use the default Times font to print documents. Load new fonts to make your document look great.
I’m also a consultant, offering workshops and training - and as part of those workshops, I provide printed workbooks to participants. I also use the Crimson Pro font, mentioned in Robin’s recent article about Comparing my favorite fonts. But I also wanted to explore other fonts to make a great print product.
The “font sample” test page on my HP color LaserJet printer provides a long list of PCL supported fonts, including Albertus, AntiqOlive, Arial, Coronet, Garamond, and Helvetica. The built-in PostScript fonts overlap with the PCL fonts, but my favorites include New Century Schoolbook and Palatino. These all look great for printing book interiors.
I wanted to examine print samples using the PostScript fonts, and I immediately turned to the “PS” fonts for groff.
The standard groff fonts
If you look in the /usr/share/groff/current/font directory, you’ll find several directories that contain fonts for different output devices; groff’s PostScript fonts are stored in the devps directory. Each font is represented as a set of typefaces. For example, the Times font is stored in four files:
TRfor Times in roman styleTBfor Times boldTBIfor Times in bold-italic styleTIfor Times in italic style
For my default install of groff 1.23.0 on Linux, I see these font files:
$ ls [A-Z]*
AB   AR    BMI  CBI  DESC  HBI  HNBI  HR   NI  PBI  S   TBI  ZCMI
ABI  BMB   BMR  CI   EURO  HI   HNI   NB   NR  PI   SS  TI   ZD
AI   BMBI  CB   CR   HB    HNB  HNR   NBI  PB  PR   TB  TR   ZDR
These files are plain text font metric information for every character in each typeface. The file starts with a comment block with information about the font, then the details about the font characters. Because they are plain text, we can run a grep command to find the comment line with the font’s full name for each font file. Processing the filenames that end in R gives only the “roman” style for each font, which is enough to tell us about the fonts contained here:
$ grep FullName [A-Z]*R
AR:#   FullName ITC Avant Garde Gothic Book
BMR:#   FullName ITC Bookman Light
CR:#   FullName Courier
HNR:#   FullName Helvetica Narrow
HR:#   FullName Helvetica
NR:#   FullName New Century Schoolbook Roman
PR:#   FullName Palatino Roman
TR:#   FullName Times Roman
ZDR:#   FullName ITC Zapf Dingbats Reverse
However, I wouldn’t format a book interior using Dingbats, so I will skip the ZDR font in my tests.
Using fonts with groff
To see what each font looks like, we can generate a series of sample documents containing each font by loading the fonts into groff’s “font positions” and processing a sample document that references those fonts. groff emulates the original Unix troff command, which was the typesetter version of the roff document preparation system, developed at Bell Labs. troff was first developed for the C/A/T Phototypesetter, which used a series of optical discs containing etched versions of several popular fonts. Before generating a document, the operator would mount the discs for the fonts they wanted to use in the document. The .ft troff formatting instruction would move the correct font disc into position, and following text used that font. For example, a document might load whatever font is in position 2 using this command:
.ft 2While later typesetters used digital files, troff maintained the .ft instruction to perform the same task: load a font for use in printing a document. GNU groff loads fonts from files on the filesystem, which are then loaded into “font positions” using the .fp command. To “mount” the TR (Times roman) font into position 1, use this command:
.fp 1 TRYou can load a series of font files into different positions with successive .fp instructions:
.fp 1 TR
.fp 2 TB
.fp 3 TBI
.fp 4 TI
Generating a font test page
Through some experimenting, I found that groff loads 9 fonts into position by default. This Bash command generates a sample font test page of the default fonts:
$ for font in $(seq 1 9); do echo '.sp'; echo ".ft $font"; echo "This is font $font"; done > fonts.tro The new file (fonts.tro) contains a series of commands that adds a single blank line (.sp) then loads a new font (.ft) and prints a 1-line font test:
$ cat fonts.tro
.sp
.ft 1
This is font 1
.sp
.ft 2
This is font 2
.sp
.ft 3
This is font 3
.sp
.ft 4
This is font 4
.sp
.ft 5
This is font 5
.sp
.ft 6
This is font 6
.sp
.ft 7
This is font 7
.sp
.ft 8
This is font 8
.sp
.ft 9
This is font 9
I didn’t want to use a standard macro package like -me or -mom to generate the font test, because a macro package might load its own fonts into these positions. Instead, I created a separate file that defined a simple page in groff, with .sp 1i to add one inch of space to the top of the page, .po 1i to add one inch of space as the page offset (left margin), and .ll 6i to define the line length at six inches:
$ cat page.tro
.sp 1i
.po 1i
.ll 6i
Create the font test by concatenating both files together and processing them using groff. The -Tps instruction tells groff to generate PostScript output:
$ cat page.tro fonts.tro | groff -Tps > fonts.ps
In this sample, we can see these fonts:
- Times roman
- Times italic
- Times bold
- Times bold-italic
- Times roman
- Courier
- Courier
- Courier
- Courier
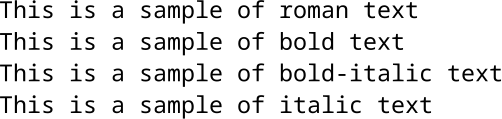
The four Courier samples are more likely to be Courier roman, Courier italic, Courier bold, and Courier bold-italic. As we'll see in the print sample for groff fonts, all Courier font styles on this system display as roman.
Samples of all groff fonts
I created a series of groff input files that loaded each of the typefaces for every PostScript font provided by groff. The fonts come in four styles - roman, bold, bold-italic, and italic - so each input file loads these styles into positions 1, 2, 3, and 4. For example, I saved a test file for the Times font as t.tro that contains these lines:
$ cat t.tro
.fp 1 TR
.fp 2 TB
.fp 3 TBI
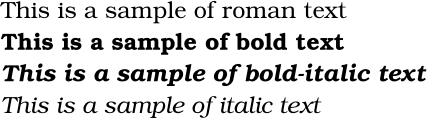
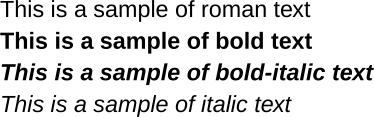
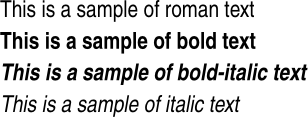
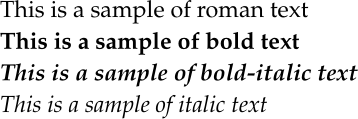
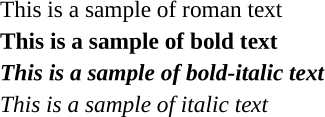
.fp 4 TITo display text in each style, I created this sample file, called sample.tro. The first line sets the font’s size to 14 points (.ps 14). Between each line, I added half a line of space (7 points) using .sp 7pt:
.ps 14
.ft 1
This is a sample of roman text
.sp 7pt
.ft 2
This is a sample of bold text
.sp 7pt
.ft 3
This is a sample of bold-italic text
.sp 7pt
.ft 4
This is a sample of italic text
With these files, I could run a single Bash for loop over each sample file, including the page.tro file to define the page and the sample.tro file with the sample text, and save the output to separate PostScript files:
$ mkdir out
$ for font in a b c hn h n p t; do cat page.tro $font.tro sample.tro | groff -Tps > out/$font.ps; done
$ ls out
a.ps  b.ps  c.ps  hn.ps  h.ps  n.ps  p.ps  t.ps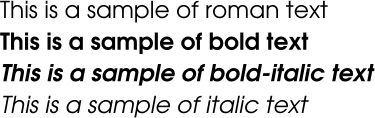

Make your documents look great
The next time you format a document in groff, consider loading one of these other excellent fonts instead of the default Times font. The right font can take your document to the next level. A serif font like Palatino or New Century Schoolbook can look great for body text, while a sans serif font like Helvetica Narrow can be an excellent choice for section headings. For a more modern appeal, try using Helvetica for body text and Avant Garde for titles and headings.

Jim Hall is an open source software advocate and technical writer. At work, Jim is CEO of Hallmentum, an IT executive consulting company that provides hands-on IT Leadership training, workshops, and coaching.