 Book content in Microsoft Word
With a few clicks in Microsoft Word, you can create a clean-looking book.
Technical writers use a variety of tools to do their work, but Microsoft Word is still a popular tool when you just need to get something done quickly. For example, you might need to create some kind of “book” content, such as a report. With a few clicks in Microsoft Word, you can create a clean-looking book.
Let’s look at an example using the desktop version of Microsoft Word. We need to use the desktop version because Word on the Web has several wonky issues, but the desktop version is okay. For this demonstration, let’s create a “book” that’s just one “chapter” long, plus a table of contents, copyright page, and cover page.
This mimics many kinds of reports that you might need to create. For example, you may not need a “copyright page” — instead, you might write a “transmittal memo” or “cover sheet” to go with the report. It’s the same thing.
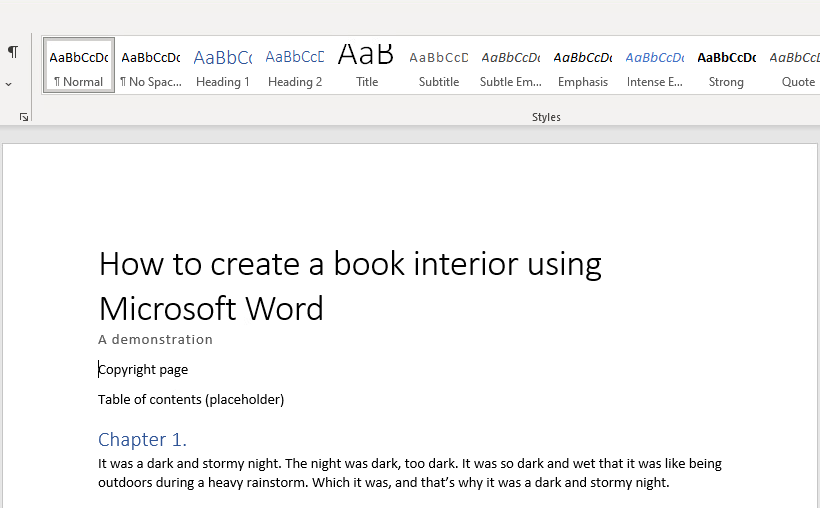
1. Create the content
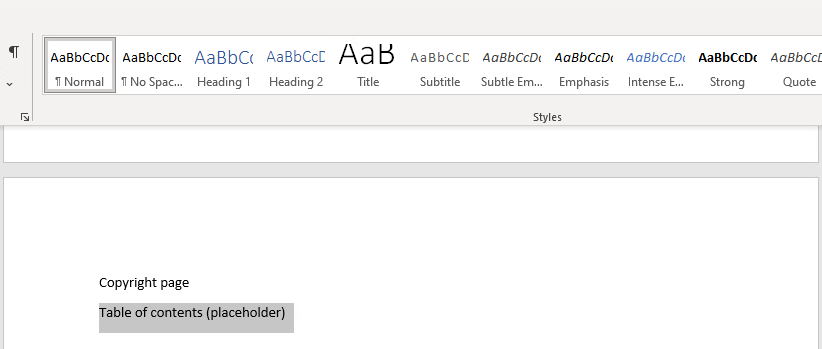
To start, let’s create some sample content. I’ll add a title (using Title style) and a subtitle (using Subtitle style) plus a “copyright page” placeholder and a “table of contents” placeholder. My first chapter uses Heading 1 style, and the paragraph uses Normal style.
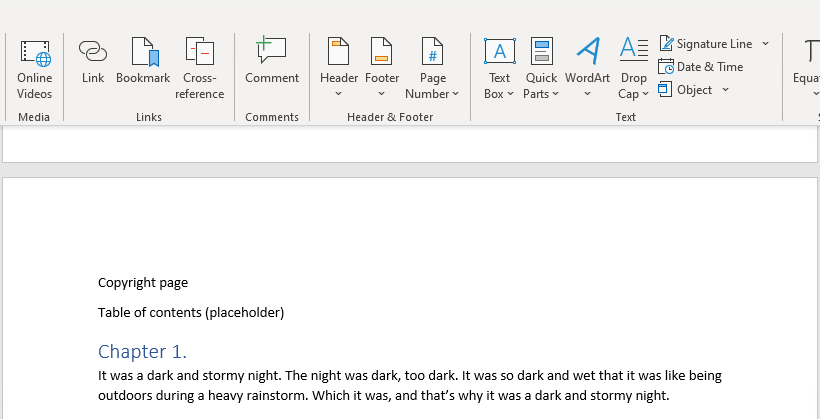
To insert a new page after the title and subtitle, and before the “copyright page,” position the cursor before the word “Copyright” then use the Insert > Page Break menu action with the Ribbon.
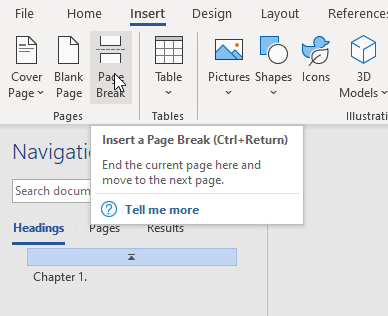
This inserts a new page break at the cursor position, so the “copyright page” starts on a new page.
2. Modify the chapter style
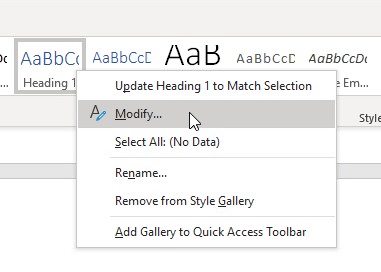
It’s easiest if you let the styles do the work for you and set up every chapter to start on a new page by modifying the Heading 1 style. To do that, right-click on the Heading 1 style inside the styles list in the Ribbon, and select Modify…
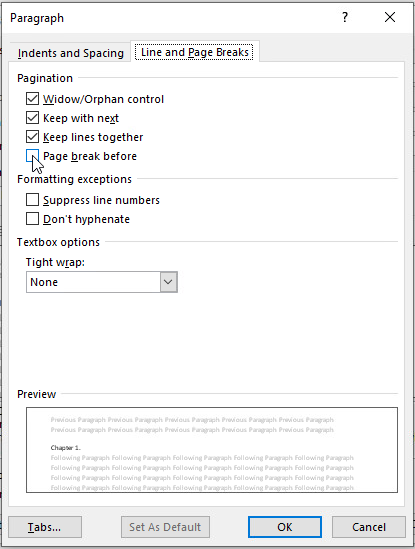
This brings up a dialog box where you can change how the chapter titles will appear. You can set the font or color here, but use the Format menu button in the bottom-left and select Paragraph… to modify the “paragraph” settings for the chapter title.
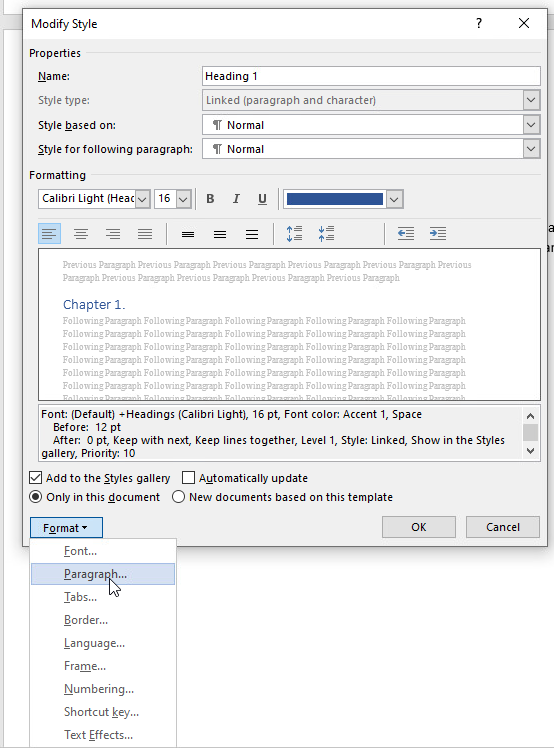
Chapters should start on a new page. You can set this by ticking the “Page break before” checkbox. Then click Ok to save your changes.
3. Add a table of contents
Microsoft Word can automatically generate a table of contents for you. To start, highlight the “placeholder” content created earlier:
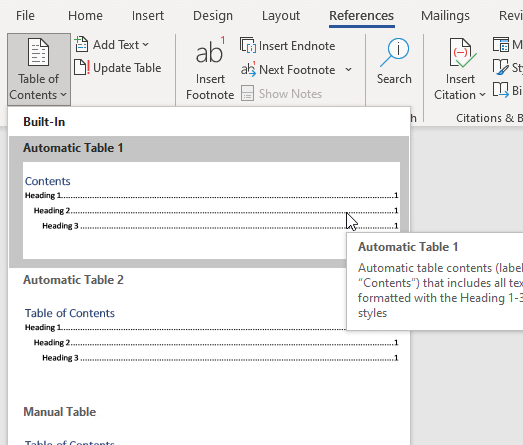
Use the References > Table of Contents mention action on the Ribbon to select a table of contents style. Word is primarily aimed at business users, so the styles here tend to be pretty bland. But that’s okay for a business report — you don’t want it to be too showy. Let’s use the plain table of contents, the “Automatic Table 1” style.
The table of contents will appear at the cursor position. In this sample document, that’s on the line after the “copyright” statement. But instead, a business report usually starts the table of contents on a new page. To put the table of contents on a new page, right-click on the “Contents” title, and select Paragraph… from the drop-down list.
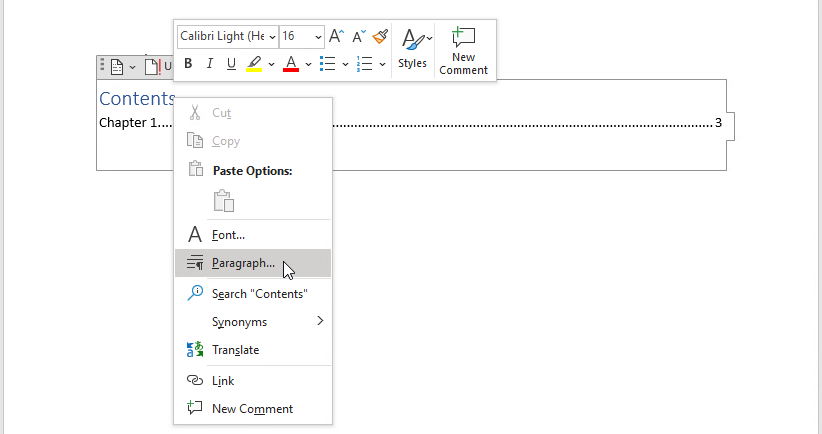
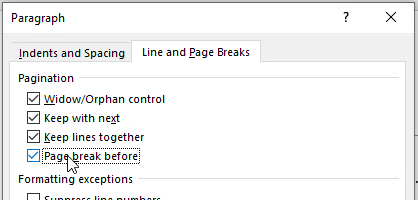
This will bring up a dialog box where you can change the paragraph settings for this “paragraph” or heading. Because we want the table of contents to start on a new page, select the “Page break before” checkbox.
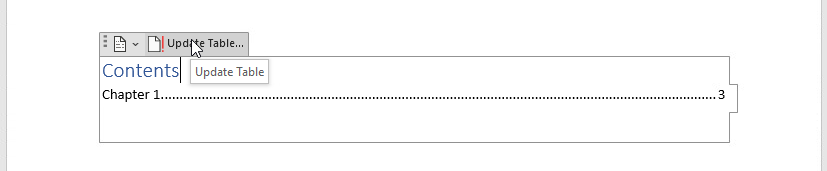
Note that as you continue to work in your document, your table of contents may not get updated for you. It’s a good idea to regenerate your table of contents before you print it or export it to PDF format. To do that, click on the table of contents to get an “actions” tab where you can select “Update Table…”
4. Page numbers in the footer
A table of contents tells you where to look for each chapter or section in the document, by listing the page number. This is also clickable when you generate a PDF. But the document doesn’t have page numbers yet, we need to add them.
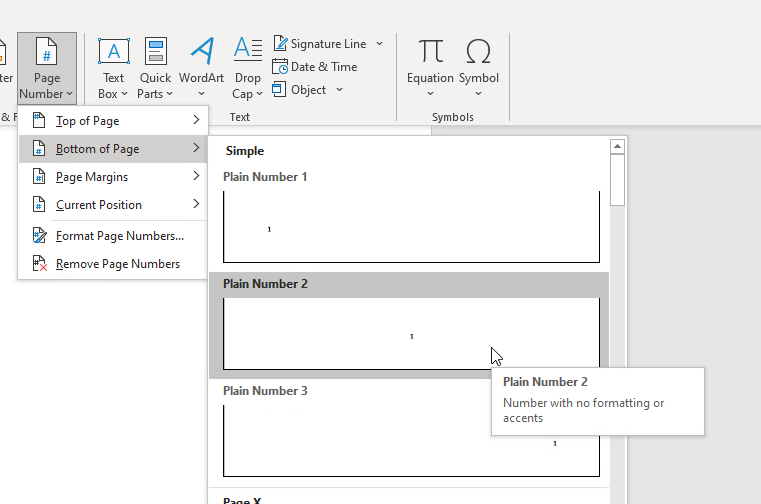
Adding page numbers is a snap in Word. Click on Page Number in the Ribbon, then select the location for the table of contents. To insert page numbers in the bottom of the page, in the footer, use the Bottom of Page menu and select the style you want. Let’s keep it simple and use a centered page number with the “Plain Number 2” style.
This adds a page number automatically on every page, in the footer.

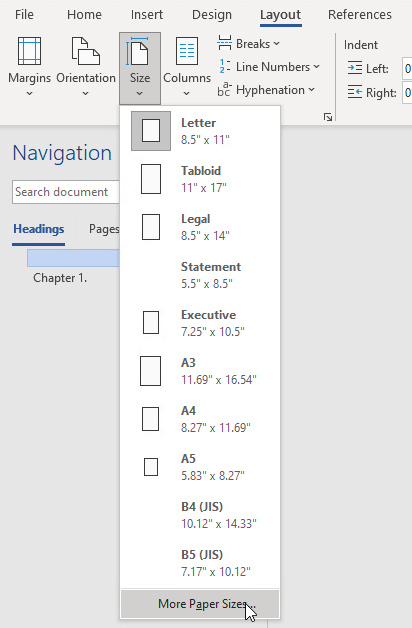
5. Change the page size
Most business reports are in US Letter style, which is 8 1/2 wide and 11 long. If you need a different size, such as a European style like A3 or A4, use the Layout > Size menu in the Ribbon.
Great looking reports in Word
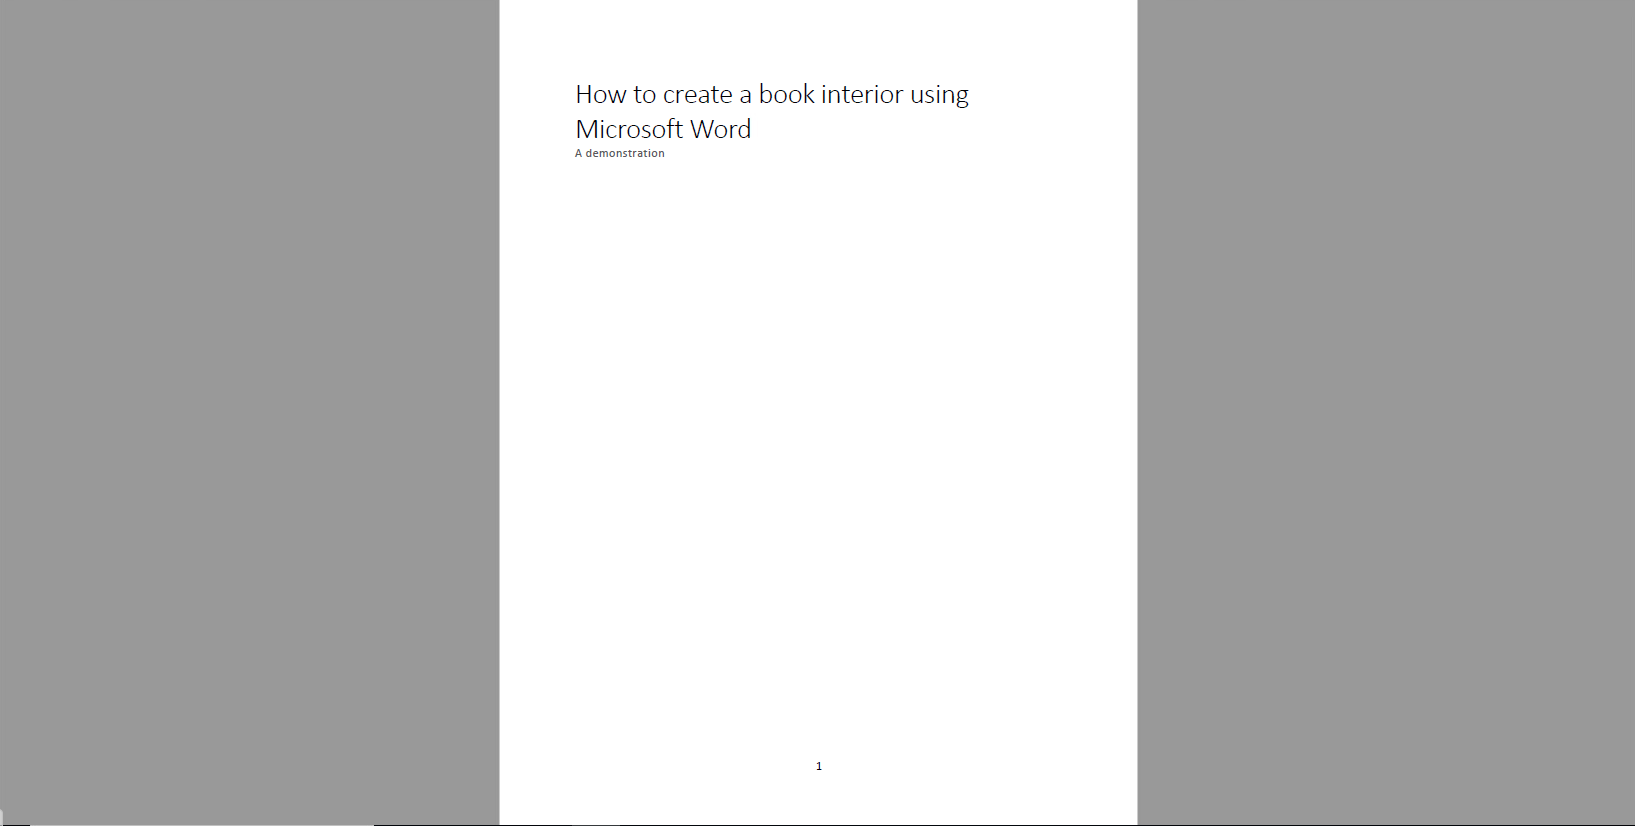
Once you have finished your book content, you can export it into PDF format from Microsoft Word. For example, this sample document looks like this in Adobe PDF viewer. The cover page:
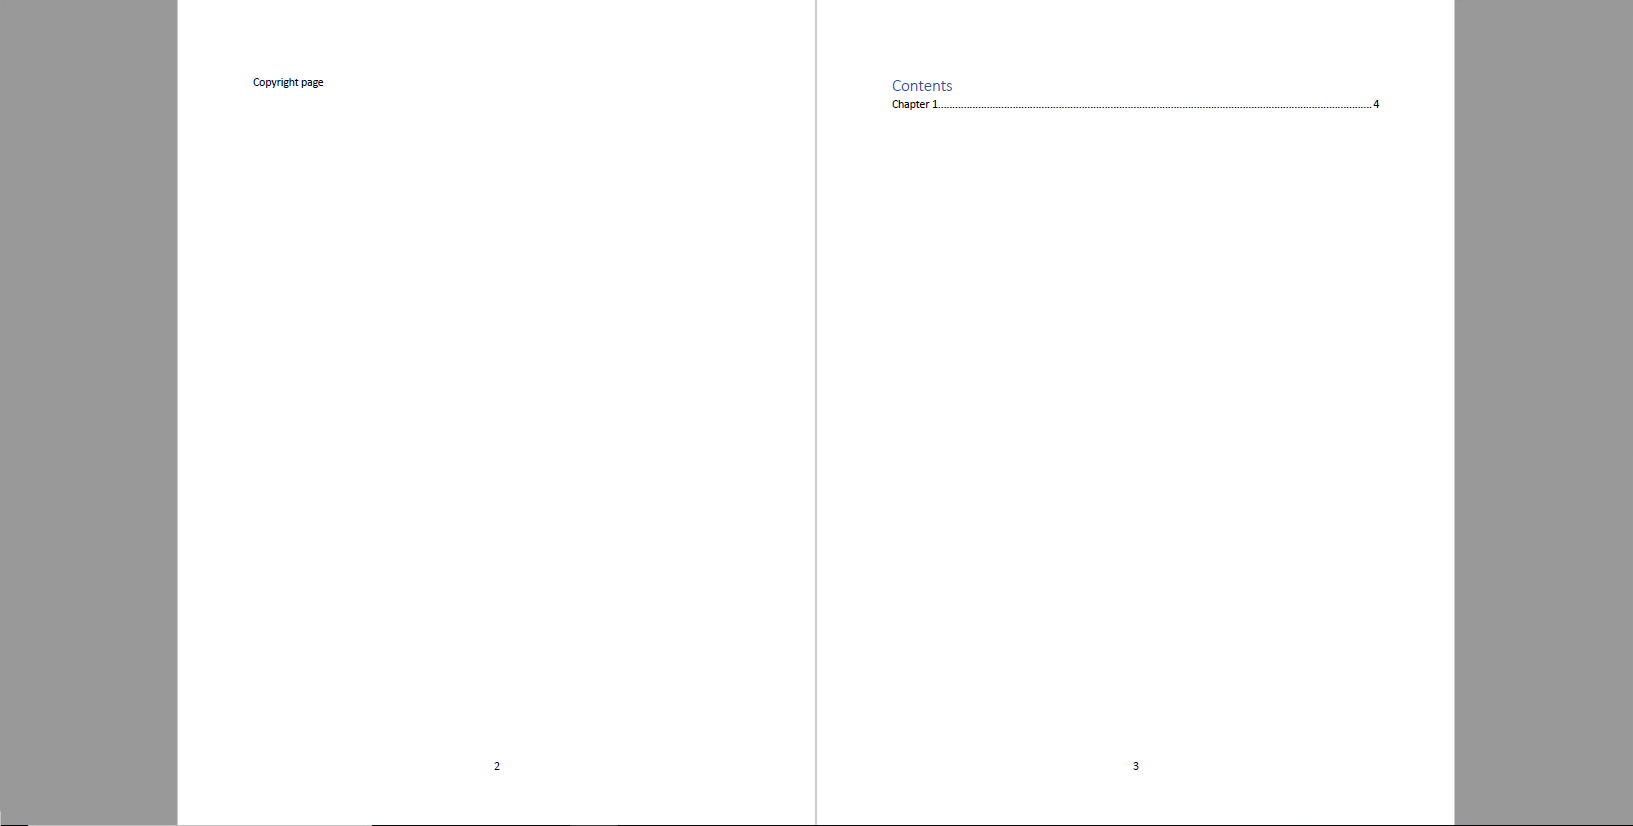
The copyright page and table of contents:
The interior pages:


Robin Bland is a technical writer in the Minneapolis/St Paul area.